Auphan POS
to our new user guide!
New to Auphan? Start hereLearn the basics in order›
Knowledge BaseLeveling up your software knowledge›
Clover SetupSetting up your Clover hardware›
TroubleshootingFix common issues›
General›
Clover ›
›
Restaurant Owner & Manager Setup Coming Soon
Menu / Pricing / Mods / Print RoutingBuild and shape what staff can ring in›
Reporting Types & SetupRead, build and export your reports›
General FeaturesDiscounts, reasons, taxes & fees›
User Group ControlWho can do what›
Table Map SetupLay out and customize your floor›
Bonus Tips & FeaturesHandy extras›
To be determined — more coming soon.
Managerial Procedures
Cash Out Report — Breakdown & Customization
What each section of the cash out report is telling you, and how to change what appears on it.
Reading the Report
Customizing What Appears
Countdown
Sold Out — 86ing
Remote Access to Your POS
You can use any computer, anywhere, to connect to your Auphan POS in real time.
We highly recommend using the Chrome web browser for the best experience.
Key Advantages — All in Real Time
- Silent login with full access to the POS front end and the management back end
- You are not taking over any computers onsite at all — 100% friction-free
- Perform any updates without ever needing to touch a local computer
- Monitor your restaurant’s live performance — including spying on the KDS
- Work onsite at your restaurant with your laptop
Getting started
Bookmark the following URL:
www.auphansoftware.com/customer/login.php
The first time you log in remotely, you’ll most likely see Chrome’s (or another browser’s) privacy warning. Here’s how to get past it:
If you see yourself using our remote login a lot on your smart phone, you should consider creating a bookmark and adding it to your home screen. You can do this for either iPhone or Android phones.
For iPhone users
For Android users
Please continue onto…
Mobile Dashboard Overview
When you remote log in through your smart phone, you’ll see one extra option called Dashboard.
The Dashboard was designed primarily for use on a smart phone. If you wish to access this same mobile Dashboard on your desktop, please visit and bookmark auphandining.com/dashboard.
The figures you see on the dashboard are controlled by System Config.
This is our legacy dashboard, and we may be switching over completely to our widget-based dashboard only.
Our recent redesign lets you use the widget-based mobile dashboard whether you log in on mobile or on a full screen.
There will be a future topic on how to customize your mobile widget dashboard — coming soon. As always, we are looking to improve our software and our dashboard. Please feel free to send us detailed feedback if you have any ideas or suggestions for improvement.
Add and remove employees
Adding Employees
Removing Employees
Employee Positions
Positions are the job roles in your restaurant — Server, Bartender, Cook — and the pay that goes with each. They also drive overtime, holiday, and tip sharing, and can change what an employee is allowed to do on the POS while clocked in under that role.
Add a position›
Go to Management → Employees → Employee Positions and click Add Position:
- Position name — in English and French.
- Position ID — optional; used for reporting.
- Group — puts the position in a Position Group for reporting and tip sharing (see below).
- Pay Type — Hourly, Weekly, Bi-Weekly, Monthly, or Flat Daily.
- Starting Pay — the default pay rate for the role (can be $0).
- Calc OT / Calc Hol. — include this position in overtime / holiday calculations.
- User Group Override — when someone clocks in as this position, use these POS permissions instead of the ones on their profile. Handy when, say, a bartender picks up a waiter shift and needs different access. Leave it as None to keep their normal permissions.
Click Save. You can also tick Management for roles with manager responsibilities, and use the up/down arrows to reorder how positions appear.
One employee, more than one position›
Someone who works as both a Server and a Bartender can hold both roles. In the employee’s profile, add each position with its own Start Date and Pay Rate — they pick the right one when they clock in.
Position Groups & tip sharing›
Under Management → Employees → Position Groups you can bundle positions into groups — for cleaner reporting (e.g. all back-of-house together) and for tip sharing, where a group can carry a tip-distribution percentage.
The same screen also has Tip Groups for tip-specific grouping. Built-in system groups can’t be deleted, but you can add, rename, and reorder your own.
Change employee hours
Recalling Previously Closed Bills
Deleting or Voiding?
“Void the card”
“Void the check”
“Void the fries”
Void — Undo the Card Payment›
A void reverses a card payment so nothing at all reaches the customer’s card. It can only be done on the same day, before the batch closes. The invoice stays; only the payment is undone.
Use it when the customer paid on the wrong card, wants to switch payment type, or the total changed and you need to start the charge over.
Delete Invoice — Remove the Bill›
Delete Invoice permanently removes the invoice itself. It is permission-controlled and written to the audit trail — deleted invoices can still be reviewed, but they cannot be restored.
Delete an Item — Remove One Line›
This is the one most often called “voiding” on the floor: the guest changes their mind, or the wrong item was rung in, and only that line needs to come off. The rest of the bill and any payment on it are untouched.
Deleting a sent item — one the kitchen has already seen — is usually permission-controlled and asks for a reason, so the kitchen and your reports stay in step with the bill.
Can't find an invoice? It may be archived
“Invoice Too Old to Recall”
If the invoice isn’t archived but still won’t open, you may see this instead:
This one isn’t a fault — it’s a time limit set in your user group. Each user group has a Recall Invoices (mins) value, and once an invoice is older than that many minutes, staff in that group can no longer recall it.
To change it, open Management > User Group, find Recall Invoices (mins), and set the window you want. For reference, 1440 minutes is one day and 4320 is three days.
Employee labour report
Support de-Tech-tives
24/7/365 — always here for you 😊
We want to be your partner in crime-fighting against issues and problems.
So if you can provide the best information — including photos/screenshots/videos — that gives our de-tech-tives the best context and evidence to help you much faster.
Customizable Buttons Reference Guide
Every button that can be placed on the ordering screen, and what it does. Your restaurant shows only the ones it needs, so many of these won’t be on your screen — that’s what makes them customizable. Tap a button for its purpose and when to use it, or search to jump straight to one.
Integration Partners
We are constantly integrating with new partners.
Tap a partner for details — or search to jump straight to one.
Auphan Gift Cards
How to sell, load, and redeem Auphan’s built-in gift cards on the POS.
Selling & activating a gift card
Gift Card Functions live under the More menu (the ··· button) on the Tables screen.
- From the Tables screen, tap More → Gift Card Functions.
- Select Activate Card.
- Scan the gift card, or enter the card number manually.
- Enter the load amount the guest is buying.
- Take payment for that amount as you would any sale.
- The card is activated — print the receipt for the guest.
Checking a balance
- Tap More → Gift Card Functions → Check Balance.
- Scan the card, or enter the number manually.
- The POS shows the current balance, card status, expiry (if any), and recent transaction history.
Redeeming — paying with a gift card
- Open the invoice and go to Payment.
- Choose Gift Card as the payment type.
- Scan or enter the gift card number — the POS shows the available balance.
- Enter the amount to charge, up to the balance.
- Confirm. Any remaining balance is printed on the receipt.
A gift card can also be a refund destination — you can return funds onto a card instead of the original tender.
eGift cards (bought online)
eGift cards are Auphan’s digital gift cards — bought online through OftenDining and emailed to the guest. They redeem exactly like a physical card at the POS. The full guest flow, in-store redemption, branding, and email setup have their own topic:
Setting it up (managers) — the TGL Editor
Auphan’s built-in gift cards are configured in the TGL Editor (Tabs, Gift Cards & Loyalty) — a back-of-house Management screen.
- Go to Management → Customer Management → Tabs / Gift Cards / Loyalty.
- Open the Gift Cards account settings to configure:
- Load amounts — preset or custom values
- Expiry rules — whether cards expire, and after how long
- Activation — by sale, manually, or CSV import
- Multi-store — whether balances are shared across locations
Issuing a batch of cards at once? The TGL Editor supports CSV batch loading — ask Auphan support for the field template.
Auphan eGift Cards
Auphan’s digital gift cards — bought online through OftenDining and emailed to the recipient, ready to redeem online or in-store.
How guests buy an eGift card
eGift cards are sold through your OftenDining online ordering page — on desktop or mobile. The guest picks an amount and fills in:
- From — their name
- To — the recipient’s name
- To email — entered twice to confirm
- An optional personal message
Payment is taken online through Bambora, Auphan’s preferred processor — or you can now use Clover eCommerce as an alternative. The recipient then receives an email with the eGift card: a barcode, card number, and CVN.
Redeeming an eGift card
Online: the guest enters the eGift card number at checkout.
In-store, with a scanner: scan the barcode straight from the guest’s email.
In-store, no scanner:
- At the payment screen, tap Gift Card.
- Choose Manual.
- Enter the last 11 digits of the card number, then the 3-digit CVN.
- Confirm — the balance is applied and any remainder stays on the card.
Guests can check their balance or reload an eGift card online at any time.
Sent to the wrong email address?
Have the original purchaser buy a replacement eGift card and pay for it with the original card:
- Note the original card’s number, CVV, and amount.
- Go to the restaurant’s OftenDining page and start a new eGift purchase.
- Enter the correct recipient email this time; reuse the same message, sender name, and amount.
- At checkout, pay with Gift Card — enter the original card number and CVV.
- The new eGift arrives at the correct address; the original card’s balance is now used up.
Set up: your card branding image
Upload a branded card image so guests recognize your restaurant. Artwork should be PNG, recommended size 375 × 240 px.
- Go to the Online Dashboard.
- Open the menu (top-right) and choose Images.
- Scroll to the bottom and upload your image.
- Click Upload/Overwrite to save.
Set up: your eGift message
Personalize the marketing message guests see when buying an eGift card.
- From Store Profile, click Messages.
- Scroll to eGift Cards and type your message. Basic text is all you need; HTML is supported for bold, italics, and underlines.
- Scroll down and click Save.
Set up: your confirmation email
Customize the header and footer of the eGift email — add restaurant info or your latest promotion. Both fields are HTML-friendly.
- From Store Profile, click Email.
- Scroll to eGift Cards and edit the header/footer.
- Use Test Email to send yourself a preview, then Save.
Auphan Loyalty Tiers Draft
Reward your regulars with a status like Silver or Gold, earned by the points they collect, and give that status a real benefit at the till.
What a tier actually does›
When an account’s collected points reach a tier’s threshold, the account moves into that tier. The tier itself is just a status. What it gives the customer is up to you:
- A discount or free item, through a sale rule that requires the tier
- Bonus points, through a collection rule that requires the tier
- Simply recognition: staff see it on the invoice, the guest sees it on the receipt
Two shapes cover most programs:
- Lifetime: counts every point the account has ever earned. Silver at 1,000, Gold at 5,000. Once reached, it stays.
- Within a period: counts points earned in a week, month or year. Gold for any month the customer collects 300 points, then dropping a level if they go quiet.
Which points count›
This trips people up, so it is worth being exact.
Points count toward a tier when they come from a collection, a manual edit, or a transfer in.
Points do not come back off when the customer redeems them, pays with them, or lets them expire. Someone who earns 5,000 points and spends them all is still Gold.
The one thing that does remove points from the count is a voided sale.
What happens when the period ends›
Only period tiers have this. The Next Period setting on the highest tier the customer reached decides what carries over.
- Maintain Previous Period, the default: the customer keeps last period’s tier for the whole of the new one, and can still climb higher.
- Reset: nothing carries over. They start again from no tier.
- Drop By Tiers: they fall the number of levels you choose. Gold with Drop By 1 becomes Silver. Collecting again in the new period can lift them back up.
A tier reached inside a window is held until that window ends, even if a void later drops the points below the threshold. Only a higher tier replaces it early.
When the window rolls over depends on the Timezone set on the system in the TGL Editor. Leave it empty and the server uses UTC, which for a Canadian restaurant means periods roll over in the middle of the afternoon. Set it.
A worked example. Gold at 300 (Drop By 1), Silver at 150 (Drop By 1), Bronze at 50 (Maintain).
A customer collects 320 points in March, so they are Gold for March. April starts them at Silver. Collect 200 more in April and they are Gold again for the rest of April. Collect nothing and they are Bronze in May, and stay Bronze until they collect 50 in a month again.
Setting them up›
Go to Management → Customer Programs → Loyalty Tiers, directly under Loyalty Rewards. It uses the same permission as the TGL Editor.
Click Add to create one. The fields that decide behaviour:
- Loyalty Type: the reward type whose points count. Get this wrong and the tier never fires.
- Tier Type: Lifetime, or Within a Period.
- Points Required: the threshold. Two tiers of the same type on one reward type cannot share a number.
- Next Period and Drop By: period tiers only, covered above.
- Valid For: how long the tier is held once reached, or No Expiry.
- Start Date: also the pivot for a period tier’s windows. A monthly tier started on the 15th runs the 15th to the 14th. Leave it blank and windows follow the calendar.
- Status: untick Enabled to stop offering a tier without deleting it.
Where the tier shows up›
Once an account with a tier is loaded onto an invoice:
- On the invoice screen: in bold beside the masked account number, for example Loyalty Account: ***2323 Gold
- On the printed receipt: under the Loyalty Account heading, above points earned and redeemed
The POS keeps a copy of each account’s tiers, refreshed every time the account is loaded online. If you are offline, the invoice shows the tier from the last online load.
To see tiers across all your customers, run the Loyalty Accounts report under Customer in Reports: untick Summary so accounts list individually, tick Loyalty Tiers in the Columns box, and run it. Each reward type gains a Tier column. An account holding both a lifetime and a period tier shows both, separated by a slash.
It is not working›
The customer has enough points but shows no tier
Check three things: the tier is Enabled, its Start and End dates cover today, and it is built on the same reward type the points were collected on. That last one is the usual culprit.
The period rolled over but they still show last period’s tier
Rollover is done by an hourly job on the loyalty server, so within the hour after midnight in your system timezone the old tier can still show. Loading the account again on the POS always shows the current state.
Can existing customers reach a tier from points they already had?
Yes. Lifetime tiers count the account’s whole history and period tiers count the current window, so your regulars are placed as soon as their account is next evaluated.
Quebec Web-SRMQuébec Web-SRMBrouillon
Web-SRM is Revenu Québec's fiscal system.
Every restaurant operating in Quebec must be connected to it.
A Web-SRM QR code must be printed with every invoice.Le Web-SRM est le système fiscal de Revenu Québec.
Chaque restaurant exploité au Québec doit y être connecté.
Un code QR Web-SRM doit être imprimé sur chaque facture.
Click here to learn moreCliquez ici pour en savoir plus — Revenu Québec's official page on mandatory billing in the restaurant sector (opens in a new tab, so this guide stays open).la page officielle de Revenu Québec sur la facturation obligatoire dans le secteur de la restauration (s'ouvre dans un nouvel onglet, pour que ce guide reste ouvert).
What It Is & Why It MattersCe que c'est et pourquoi c'est important
Scanning the QR code on a Quebec receipt opens Revenu Québec's record of that exact transaction — it's how the province tracks sales for tax and audit.Scanner le code QR d'un reçu du Québec ouvre le dossier de Revenu Québec pour cette transaction exacte — c'est ainsi que la province suit les ventes aux fins d'impôt et de vérification.
- Native integration. Auphan talks directly to Revenu Québec's Web-SRM — no third-party connector. Every invoice is registered and its QR code generated automatically.Intégration native. Auphan communique directement avec le Web-SRM de Revenu Québec — aucun connecteur tiers. Chaque facture est enregistrée et son code QR est généré automatiquement.
- Compliant invoices. The QR code, the tax lines (TPS/TVQ) and the audit trail are handled for you. Staff don't do anything differently at the till.Factures conformes. Le code QR, les lignes de taxe (TPS/TVQ) et la piste de vérification sont gérés pour vous. Le personnel ne fait rien de différent à la caisse.
- Hardware MEV still works. If you're on a legacy MEV unit, Auphan keeps working with it in parallel until you choose to move to Web-SRM.Le MEV matériel fonctionne toujours. Si vous utilisez un ancien module MEV, Auphan continue de fonctionner avec lui en parallèle jusqu'à ce que vous décidiez de passer au Web-SRM.
For Your StaffPour votre personnel
What's Different Day-to-DayCe qui change au quotidien›
Once it's running, the changes your staff actually notice are small:Une fois en marche, les changements que votre personnel remarque sont minimes :
- Every receipt prints in French, with the QR code, the TPS/TVQ tax lines and “FACTURE ORIGINALE.”Chaque reçu s'imprime en français, avec le code QR, les lignes de taxe TPS/TVQ et « FACTURE ORIGINALE ».
- Offline mode. If the internet drops, the POS keeps printing invoices — they're flagged as offline and you'll see a Web-SRM offline notification. When the connection returns, the queued invoices upload to Revenu Québec automatically; no action needed.Mode hors ligne. Si Internet tombe, le POS continue d'imprimer les factures — elles sont marquées comme hors ligne et vous verrez une notification Web-SRM hors ligne. Au retour de la connexion, les factures en file d'attente sont téléversées à Revenu Québec automatiquement ; aucune action requise.
What You Can't Change on a Quebec InvoiceCe que vous ne pouvez pas modifier sur une facture québécoise›
This is the big one for front-line staff. Because Web-SRM sends fiscal documentation to Revenu Québec the moment an invoice closes, a closed Quebec invoice can't be freely edited the way it can elsewhere.C'est le point le plus important pour le personnel de première ligne. Comme le Web-SRM transmet la documentation fiscale à Revenu Québec dès qu'une facture est fermée, une facture québécoise fermée ne peut pas être modifiée librement comme ailleurs.
Reopening a Closed Invoice (“Recalled” Invoices)Rouvrir une facture fermée (factures « rappelées »)
When you use Recall Invoice on a closed invoice, Web-SRM reverses the original transaction with Revenu Québec and locks the invoice down. From that point you can only change the payment type.Lorsque vous utilisez Rappeler la facture sur une facture fermée, le Web-SRM annule la transaction d'origine auprès de Revenu Québec et verrouille la facture. À partir de là, vous ne pouvez modifier que le type de paiement.
What you can do: remove, add or change payments, reclose the invoice, and reprint merchant or customer receipt copies.Ce que vous pouvez faire : retirer, ajouter ou modifier des paiements, refermer la facture, et réimprimer les copies du reçu (commerçant ou client).
Recall = payment fixes only. For an item mistake on a closed invoice, don't recall — create a refund instead. Train staff on that difference, and verify items are correct before closing an invoice.Rappel = corrections de paiement seulement. Pour une erreur d'article sur une facture fermée, ne rappelez pas — créez plutôt un remboursement. Formez le personnel à cette distinction, et vérifiez que les articles sont exacts avant de fermer une facture.
Common cases:Cas fréquents :
- Paid cash, wants to pay by card: Recall → remove the cash payment → add the card payment → reclose.Payé comptant, veut payer par carte : Rappeler → retirer le paiement comptant → ajouter le paiement par carte → refermer.
- Wrong item or quantity on a closed invoice: reclose the recalled invoice as-is, then create a refund invoice for the correction.Mauvais article ou quantité sur une facture fermée : refermez la facture rappelée telle quelle, puis créez une facture de remboursement pour la correction.
- Need to remove a closed invoice entirely: you can't delete a recalled one — reclose it with the original payment, then create a separate refund invoice to reverse it. That keeps the audit trail Revenu Québec requires.Besoin de supprimer entièrement une facture fermée : vous ne pouvez pas supprimer une facture rappelée — refermez-la avec le paiement d'origine, puis créez une facture de remboursement distincte pour l'annuler. Cela préserve la piste de vérification exigée par Revenu Québec.
Which Function to UseQuelle fonction utiliser
- Delete Invoice — for open invoices that haven't been closed yet.Supprimer la facture — pour les factures ouvertes qui n'ont pas encore été fermées.
- Refund — for item corrections after an invoice is closed.Remboursement — pour corriger des articles après la fermeture d'une facture.
- Void Payment — to remove a payment before reclosing the invoice.Annuler le paiement — pour retirer un paiement avant de refermer la facture.
- Failed to Pay — when a payment cannot be processed.Annulation (échec de paiement) — lorsqu'un paiement ne peut pas être traité.
Delivery & Takeout Orders Can't Be ModifiedLes commandes de livraison et pour emporter ne peuvent pas être modifiées›
The problem: staff can't add or remove items on a delivery or takeout order, and are told to cancel and create a new bill.Le problème : le personnel ne peut pas ajouter ou retirer d'articles sur une commande de livraison ou pour emporter, et doit annuler et créer une nouvelle facture.
Why: the order was closed automatically after payment. Web-SRM immediately sends the fiscal documentation to Revenu Québec, which prevents any item changes from that moment on.Pourquoi : la commande a été fermée automatiquement après le paiement. Le Web-SRM transmet immédiatement la documentation fiscale à Revenu Québec, ce qui empêche toute modification d'articles à partir de ce moment.
What to do:Que faire :
- Turn off auto-close in Management > Online Orders > “Close Paid Orders.” Staff then close orders manually after verifying the items, which leaves a window for modifications.Désactivez la fermeture automatique dans Management > Online Orders > « Close Paid Orders ». Le personnel ferme alors les commandes manuellement après avoir vérifié les articles, ce qui laisse une fenêtre pour les modifications.
- For orders that are already closed: items can't be modified (Quebec regulation). Create a new order with the correct items, and issue a refund for the original if needed.Pour les commandes déjà fermées : les articles ne peuvent pas être modifiés (règlement du Québec). Créez une nouvelle commande avec les bons articles, et effectuez un remboursement sur l'originale au besoin.
Deleting an Invoice That Hasn't Been Paid YetSupprimer une facture qui n'a pas encore été payée›
Removing an open invoice (items entered, not yet closed) gives you two options — pick the one that matches what actually happened, because each sends a different record to Revenu Québec:Retirer une facture ouverte (articles saisis, pas encore fermée) vous donne deux options — choisissez celle qui correspond à ce qui s'est réellement passé, car chacune transmet un enregistrement différent à Revenu Québec :
- Delete Invoice — the order won't be paid for a normal reason: the customer changed their mind before paying, it was entered wrong, a table walked out before ordering, or it's a duplicate. Sends a cancellation record, and items return to inventory where applicable.Supprimer la facture — la commande ne sera pas payée pour une raison normale : le client a changé d'avis avant de payer, elle a été mal saisie, une table est partie avant de commander, ou c'est un doublon. Transmet un enregistrement d'annulation, et les articles retournent à l'inventaire s'il y a lieu.
- Failed to Pay (Annulation) — the order should have been paid but wasn't: the card was declined, the customer couldn't pay, a dine-and-dash, or a terminal failure. Sends a “failure to pay” record, which is a different type of fiscal record for unpaid transactions.Annulation (échec de paiement) — la commande aurait dû être payée mais ne l'a pas été : la carte a été refusée, le client n'a pas pu payer, un départ sans payer, ou une panne du terminal. Transmet un enregistrement d'« échec de paiement », un type d'enregistrement fiscal différent pour les transactions impayées.
Either way the invoice is closed out and can't be reopened, and both are logged for the audit trail.Dans les deux cas, la facture est fermée et ne peut pas être rouverte, et les deux sont enregistrées dans la piste de vérification.
Closed invoices can't be deleted directly — you must recall first, after which only payment changes are allowed (see above).Les factures fermées ne peuvent pas être supprimées directement — vous devez d'abord les rappeler, après quoi seules les modifications de paiement sont permises (voir ci-dessus).
Teach staff the distinction: Delete Invoice = a customer or business decision before payment. Failed to Pay = a payment attempt that was unsuccessful. The choice affects financial reporting and tax implications, so it isn't cosmetic.Enseignez la distinction au personnel : Supprimer la facture = une décision du client ou de l'entreprise avant le paiement. Annulation (échec de paiement) = une tentative de paiement infructueuse. Le choix a une incidence sur les rapports financiers et les implications fiscales ; ce n'est donc pas cosmétique.
Delete Reasons & the Audit TrailRaisons de suppression et piste de vérification›
Both Delete Invoice and Failed to Pay require you to pick a delete reason from your configured list. Common reasons include customer cancellation, staff error, payment declined, customer unable to pay, system error, and duplicate order.Tant Supprimer la facture que Annulation (échec de paiement) exigent de choisir une raison de suppression dans votre liste configurée. Raisons fréquentes : annulation par le client, erreur du personnel, paiement refusé, client incapable de payer, erreur système, et commande en double.
Choose accurately — the reason is sent to Revenu Québec, is required for compliance, helps with loss-prevention analysis, and is useful for spotting training needs.Choisissez avec précision — la raison est transmise à Revenu Québec, est exigée pour la conformité, aide à l'analyse de prévention des pertes, et est utile pour repérer les besoins de formation.
If partial payments exist you may need to void payments first; the system will guide you through the steps, and each payment removal is tracked for audit purposes.S'il y a des paiements partiels, vous devrez peut-être annuler les paiements d'abord ; le système vous guidera à travers les étapes, et chaque retrait de paiement est enregistré à des fins de vérification.
Where Deletions Are RecordedOù les suppressions sont enregistrées
- Web SRM Invoice Log — all delete actions with their reasons.Web SRM Invoice Log — toutes les actions de suppression avec leurs raisons.
- Web SRM Txn Log — the technical transactions sent to Revenu Québec.Web SRM Txn Log — les transactions techniques transmises à Revenu Québec.
- Invoice Logs report — the complete deletion history, with employee details and timestamps.Rapport Invoice Logs — l'historique complet des suppressions, avec les détails des employés et les horodatages.
Web-SRM ReportsRapports Web-SRM›
Turning on Web-SRM adds three reports:L'activation du Web-SRM ajoute trois rapports :
- Web SRM User Report (Receipt) — the summary of recorded totals mandated by Web-SRM.Web SRM User Report (Receipt) — le sommaire des totaux enregistrés exigé par le Web-SRM.
- Web SRM Invoice Log — every action on invoices (deletes, prints, etc.).Web SRM Invoice Log — chaque action sur les factures (suppressions, impressions, etc.).
- Web SRM Txn Log — all data sent to and received from Revenu Québec; also handy for troubleshooting a specific invoice.Web SRM Txn Log — toutes les données envoyées à Revenu Québec et reçues de lui ; pratique aussi pour dépanner une facture précise.
Receipt Footer Placement — Tips Above the QR CodeEmplacement du pied de reçu — pourboires au-dessus du code QR›
You can control where your receipt footer prints relative to the mandatory Web-SRM elements — useful for putting tip suggestions right above the QR code, where customers scan. In Management > Store Setup > Receipt Setup, add the marker [web_srm_footer] in your footer, for example:Vous pouvez contrôler où votre pied de reçu s'imprime par rapport aux éléments Web-SRM obligatoires — utile pour placer les suggestions de pourboire juste au-dessus du code QR, là où les clients scannent. Dans Management > Store Setup > Receipt Setup, ajoutez le marqueur [web_srm_footer] dans votre pied de page, par exemple :
Thank you for your visit!

[web_srm_footer]

Suggested Tips:
15% = [SUBTOTAL=15]
18% = [SUBTOTAL=18]
20% = [SUBTOTAL=20]
That prints in this order: your thank-you message, the Web-SRM tax and payment information, your tip suggestions, then the Web-SRM QR code and transaction details.Cela s'imprime dans cet ordre : votre message de remerciement, les informations de taxe et de paiement Web-SRM, vos suggestions de pourboire, puis le code QR Web-SRM et les détails de la transaction.
Without the marker, your footer prints between the Web-SRM payment info and the QR code (the default behaviour).Sans le marqueur, votre pied de page s'imprime entre les informations de paiement Web-SRM et le code QR (le comportement par défaut).
Other UsesAutres usages
- Promotional messages — marketing content placed strategically on receipts.Messages promotionnels — contenu marketing placé stratégiquement sur les reçus.
- Contact information — store details or social media handles.Coordonnées — détails du commerce ou identifiants de réseaux sociaux.
- Special instructions — pickup times, loyalty program info, and so on.Instructions spéciales — heures de ramassage, infos sur le programme de fidélité, etc.
All mandatory Web-SRM elements always appear. The marker itself is removed from the printed receipt, and extra line breaks around it are cleaned up automatically.Tous les éléments Web-SRM obligatoires apparaissent toujours. Le marqueur lui-même est retiré du reçu imprimé, et les sauts de ligne superflus autour de lui sont nettoyés automatiquement.
One-time installation and back-office configuration. Restaurant staff don't need anything in this section — your Auphan onboarding contact handles it.Installation unique et configuration en arrière-plan. Le personnel du restaurant n'a besoin de rien dans cette section — votre contact d'intégration Auphan s'en occupe.
Before You Start — Dependency InstallAvant de commencer — installation de la dépendance›
Collect the four Revenu Québec numbers from the customer:Recueillez les quatre numéros de Revenu Québec auprès du client :
- User Identification NumberNuméro d'identification de l'utilisateur
- User Authorization CodeCode d'autorisation de l'utilisateur
- QST number — Taxe de vente du QuébecNuméro de TVQ — Taxe de vente du Québec
- GST number — Taxe sur les produits et servicesNuméro de TPS — Taxe sur les produits et services
Revenu Québec issues these when the establishment registers for SRM/Web-SRM, so the customer's accountant usually has them on file.Revenu Québec les délivre lorsque l'établissement s'inscrit au SRM/Web-SRM ; le comptable du client les a donc habituellement en dossier.
Then install the Web-SRM dependency: download Auphan's Web-SRM install script from the Auphan updates page and unzip it into the POS install folder (e.g. c:\auphansystem or d:\restaurant). Open the unzipped folder and run install-as-admin.bat as Administrator.Installez ensuite la dépendance Web-SRM : téléchargez le script d'installation Web-SRM d'Auphan depuis la page des mises à jour Auphan et décompressez-le dans le dossier d'installation du POS (p. ex. c:\auphansystem ou d:\restaurant). Ouvrez le dossier décompressé et exécutez install-as-admin.bat en tant qu'administrateur.
POS Setup in ManagementConfiguration du POS dans Management›
Taxes
Create the mandatory GST/TPS (5%) and QST/TVQ (9.975%).Créez les taxes obligatoires GST/TPS (5 %) et QST/TVQ (9,975 %).
For any service charge or other charge, set its Priority the same as TPS and TVQ, and set Ontop Tax to TPS and TVQ.Pour tout frais de service ou autre frais, réglez sa Priority (priorité) à la même valeur que TPS et TVQ, et réglez Ontop Tax sur TPS et TVQ.
System ConfigConfiguration système
In System Configuration, set SRM System = SRM - Quebec WEB. Then log out and back into Management — the Web SRM setup page appears under Online Services.Dans System Configuration, réglez SRM System = SRM - Quebec WEB. Déconnectez-vous puis reconnectez-vous à Management — la page de configuration Web SRM apparaît sous Online Services.
Web SRM Setup PagePage de configuration Web SRM
Fill in the establishment details, assign the QST and GST taxes, and set the time zone to match the establishment.Remplissez les détails de l'établissement, assignez les taxes TVQ et TPS, et réglez le fuseau horaire pour correspondre à l'établissement.
Press Save and Generate Initial Certificates to register each station with Revenu Québec. Come back and press it again any time stations are added later.Appuyez sur Save and Generate Initial Certificates pour enregistrer chaque station auprès de Revenu Québec. Revenez appuyer dessus à nouveau chaque fois que des stations sont ajoutées par la suite.
Certificates & MaintenanceCertificats et entretien›
Certificates are generated per station and stored in the server's Windows certificate manager. That means if the server changes, you must regenerate the certificate for every station.Les certificats sont générés par station et stockés dans le gestionnaire de certificats Windows du serveur. Cela signifie que si le serveur change, vous devez régénérer le certificat pour chaque station.
Use the Certificate section at the bottom of the Web SRM page to renew, delete or verify certificates. Select a station from the dropdown to see its certificate information.Utilisez la section Certificate au bas de la page Web SRM pour renouveler, supprimer ou vérifier les certificats. Sélectionnez une station dans le menu déroulant pour voir les informations de son certificat.
On recent versions, use this section to verify a certificate exists and is valid. If it isn't, delete the certificate in question so a new one can be generated — you'll need to give it a different name, e.g. “Clover 3 certificate 2”. After generating, use Check Certificate to confirm.Sur les versions récentes, utilisez cette section pour vérifier qu'un certificat existe et est valide. Sinon, supprimez le certificat en question afin qu'un nouveau puisse être généré — vous devrez lui donner un nom différent, p. ex. « Clover 3 certificate 2 ». Après la génération, utilisez Check Certificate pour confirmer.
Certificate ErrorsErreurs de certificat
- “Valeur invalide dans la demande de signature de certificat (CSR)… codRetour: 16” with a
CSR/CN=value — the Identification Number entered is not correct.« Valeur invalide dans la demande de signature de certificat (CSR)… codRetour: 16 » avec une valeurCSR/CN=— le Identification Number saisi n'est pas correct. - Same error with
CSR/surName=— the station name contains characters Web-SRM rejects. Remove special characters such as( )from the station name, or generate the certificate manually with a name that doesn't contain them.Même erreur avecCSR/surName=— le nom de la station contient des caractères que le Web-SRM rejette. Retirez les caractères spéciaux comme( )du nom de la station, ou générez le certificat manuellement avec un nom qui n'en contient pas. - “Failed to create COM object 'SrmCertificateManager.CertificateManager': Invalid syntax” — the dependency installation didn't complete. Re-run install-as-admin.bat as Administrator.« Failed to create COM object 'SrmCertificateManager.CertificateManager': Invalid syntax » — l'installation de la dépendance ne s'est pas terminée. Réexécutez install-as-admin.bat en tant qu'administrateur.
QR Code SizeTaille du code QR›
Under Management > Web SRM you can set the QR code size as a percentage width. There are two settings:Sous Management > Web SRM, vous pouvez régler la taille du code QR en pourcentage de largeur. Il y a deux réglages :
- Large — for mobile printers like the Clover Flex and PAX.Large — pour les imprimantes mobiles comme le Clover Flex et le PAX.
- Small — for regular full-size thermal printers.Small — pour les imprimantes thermiques pleine taille ordinaires.
Debug LoggingJournalisation de débogage›
A Debug Log checkbox in Management > Web SRM enables detailed logging for troubleshooting. It turns on the web_srm_debug flag in the system configuration, which produces more detailed logging for Web-SRM transactions and operations.Une case Debug Log dans Management > Web SRM active la journalisation détaillée pour le dépannage. Elle active l'indicateur web_srm_debug dans la configuration système, ce qui produit une journalisation plus détaillée des transactions et opérations Web-SRM.
It's useful for:C'est utile pour :
- Troubleshooting connection issues with Quebec's Web-SRM serviceDépanner les problèmes de connexion avec le service Web-SRM du Québec
- Debugging certificate-related problemsDéboguer les problèmes liés aux certificats
- Investigating transaction submission failuresEnquêter sur les échecs de soumission de transactions
- Providing detailed logs to support for issue resolutionFournir des journaux détaillés au soutien technique pour la résolution des problèmes
TroubleshootingDépannage›
Error: “You cannot close invoices without SRM device on this station.”Erreur : « You cannot close invoices without SRM device on this station. »
Don't forget that Web-SRM requires the invoice printer to be configured for the station.N'oubliez pas que le Web-SRM exige que l'imprimante de factures soit configurée pour la station.
Legacy Hardware MEVMEV matériel (ancien)›
If the site is still on the older hardware SRM/MEV box, it keeps working alongside — there's no need to switch immediately. Setup is an installer / serial-hardware job rather than a front-line task:Si le site utilise encore l'ancien boîtier SRM/MEV matériel, il continue de fonctionner en parallèle — il n'est pas nécessaire de changer immédiatement. La configuration est un travail d'installateur / de matériel série plutôt qu'une tâche de première ligne :
- In System Config the SRM System is set to SRM - Quebec.Dans System Config, le SRM System est réglé sur SRM - Quebec.
- The two taxes must be named exactly “TPS” (5%) and “TVQ” (9.975%), or the MEV won't recognize them.Les deux taxes doivent être nommées exactement « TPS » (5 %) et « TVQ » (9,975 %), sinon le MEV ne les reconnaîtra pas.
- The SRM connects by serial cable to the server, or via Auphan's Comm2IP utility for client stations.Le SRM se connecte par câble série au serveur, ou via l'utilitaire Comm2IP d'Auphan pour les stations clientes.
- The SRM printer is added as a Native Printer (SRM - Epson driver, CP1252 encoding).L'imprimante SRM est ajoutée comme Native Printer (pilote SRM - Epson, encodage CP1252).
- Invoices must print in French.Les factures doivent s'imprimer en français.
Baud-rate, cabling and RealTerm diagnostics are covered in Auphan's installer docs.Le débit en bauds, le câblage et les diagnostics RealTerm sont couverts dans les documents d'installateur d'Auphan.

Clover eCommerce
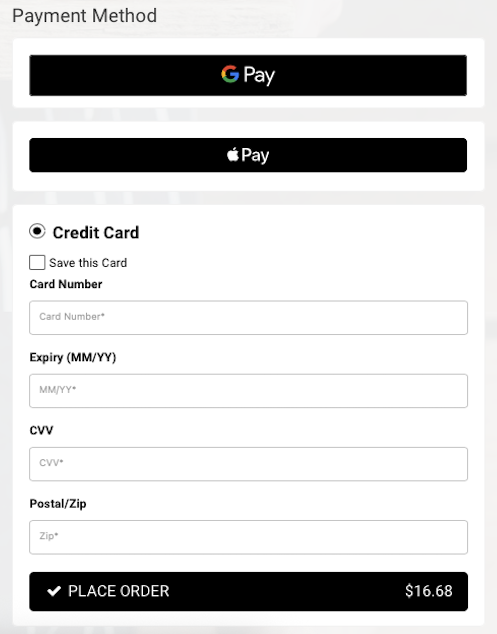
Auphan’s online ordering system OftenDining is integrated with Clover eCommerce for taking online payments.
OftenDining services that can utilize Clover eCommerce are as follows:
- Online Ordering
- Table QR Payments
- e-Gift Cards


Apple Pay & Google Pay are also supported by Clover eCommerce services.
If you currently don’t have a Clover account, your Auphan contact will be happy to refer you to quality Clover contacts.
1. Get your credentials from Clover›
2. Setup in OftenDining - Tech Access Only›
For this part, you will need the assistance of our tech support to help you complete the setup of connecting your Clover eCommerce to your OftenDining online ordering or QR payment.
When contacting our tech support or your onboarding person, please have all three key pieces of information ready:
- Clover Merchant ID (alphanumeric version)
- Clover Public Token
- Clover Private Token
The following are references for our tech / onboarding person only.
Go to Settings in OftenDining.
Then scroll down to Payment.
Troubleshooting›
Payment declined — postal code mismatch
Clover checks the billing address at the card-network level (AVS). If your Clover account enforces AVS strictly, any order where the guest’s billing postal/zip doesn’t match their bank’s records is declined — before it ever reaches us.
Fix: loosen the AVS rules in your Clover dashboard.
Currency mismatch error
The error reads: “Currency provided in request does not match default currency code for the merchant.”
Your Clover account has one fixed currency. Your store’s country setting in Often Dining decides what we send (US → USD, Canada → CAD).
Fix: make the store’s country match the currency on the Clover account.
Saved cards not working
Saved cards need multipay tokens enabled on your Clover account.
Fix: contact Clover support and ask them to enable multipay tokens.
Apple Pay button not appearing
The button only ever renders for a guest using Safari, on an Apple Pay-capable device, with at least one card in their Wallet. It will never show on Chrome, Firefox, Android, or a Safari session with no card set up — that’s normal, not a fault.
If it’s missing even on Safari with a card in Wallet, check your domain still shows as Verified under Settings → Apple Pay → IFrame integration in your Clover dashboard.
3D Secure not firing
If Clover Enable 3D Secure is ticked but charges sail through without a challenge, check these in order:
- 3DS is enabled in your Clover dashboard — Settings → Fraud Tools → 3D Secure, with a provider selected.
- The card is 3DS-enrolled. Most real consumer cards are — but test card numbers generally are not, and won’t trigger 3DS.
Clover Mini
Clover Mini operates in three distinct modes
Full Station Terminal
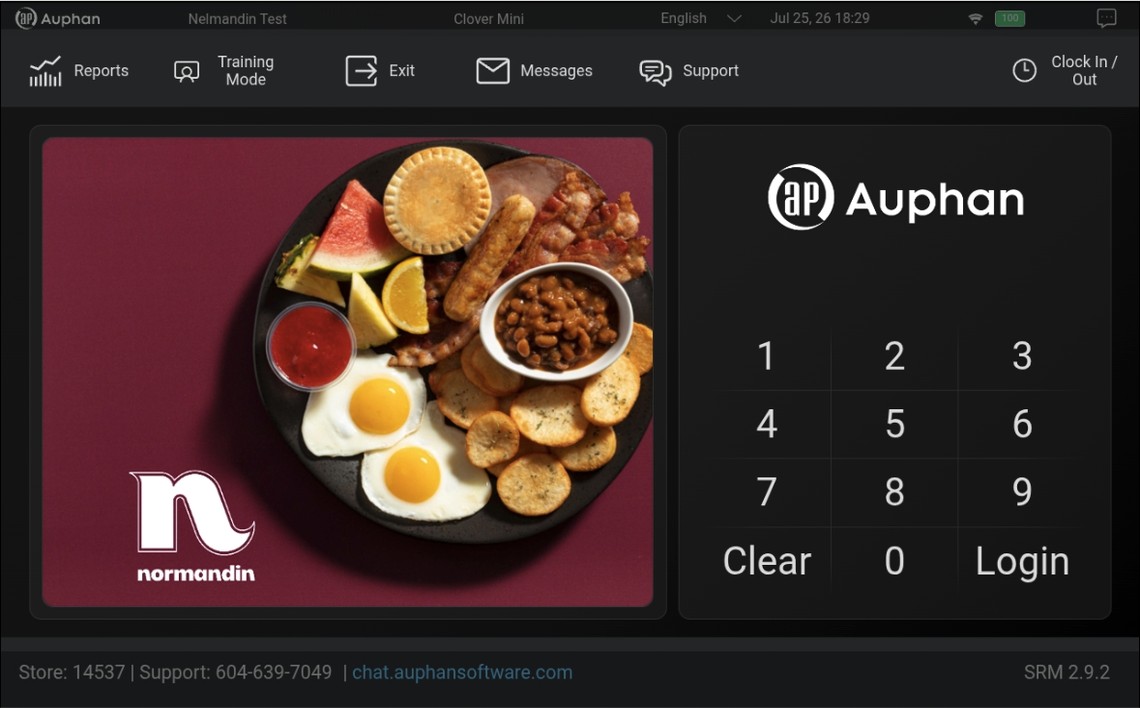
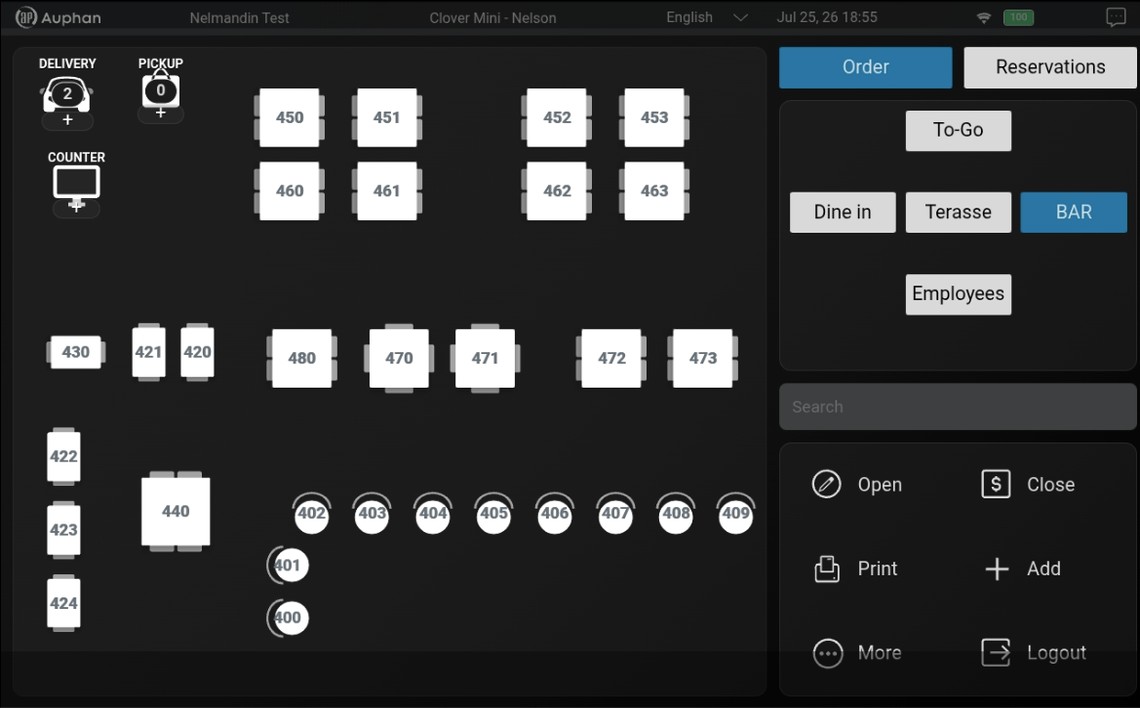
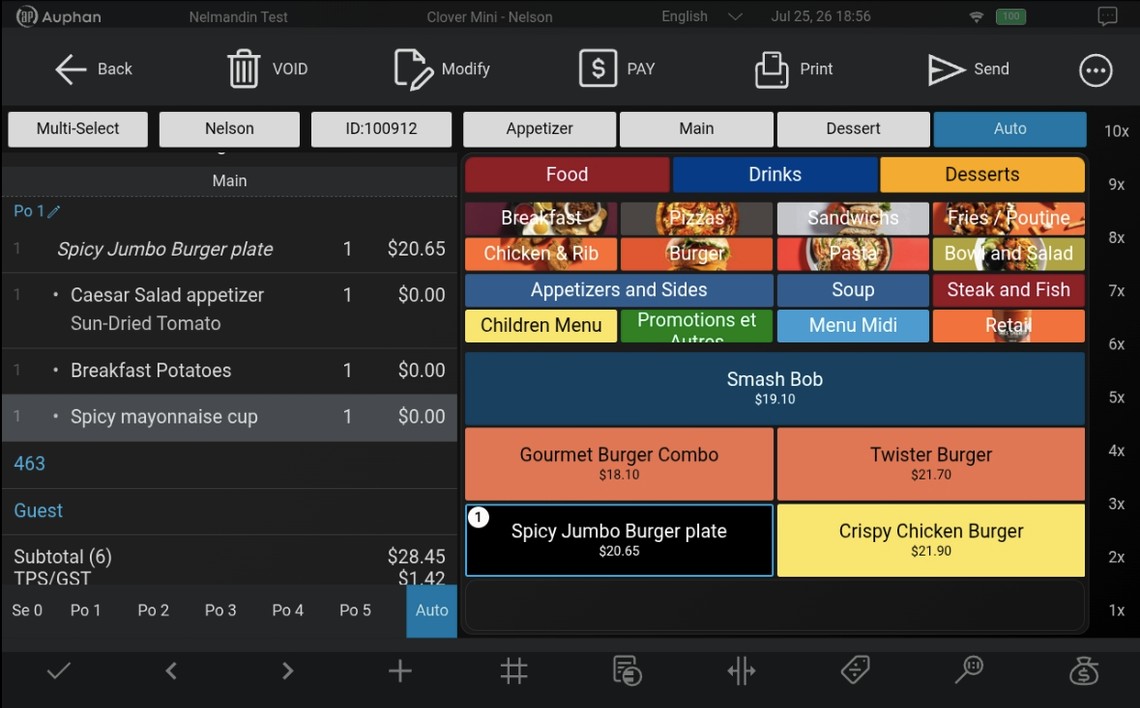
Setting up Station Mode on the Clover Mini is identical to setting up a Clover Flex in Station Mode. Setting up the built-in Mini printer is identical to the Flex as well.
Please click here to start setting up your Flex in Station Mode.
Classic Pin Pad Payment Terminal Draft
Setting up the Clover Mini as a semi-integrated pinpad for your Auphan POS.
In a semi-integrated setup, Auphan runs on your POS computer and the Clover Mini acts as the payment pinpad. They talk to each other over your local network using Clover’s Network Pay Display app, so the two devices need to be on the same network with a fixed address.
The setup has two halves: first you configure the Clover terminal, then the POS computer running Auphan.
Before you start — requirements›
- Auphan Dining 2.8.53.3034 or later.
- A Clover terminal (Flex or Mini) running the Network Pay Display app.
- Node.js on the POS computer:
- Windows 7 — node-v13.14.0-x86.msi
- Windows 10 — node-v16.14.0-x64.msi (the current LTS release usually works too)
- The Clover Flex node module library — direct download (Dropbox mirror).
1. Set a static IP on the Clover (WiFi)›
The POS reaches the Clover by its network address, so that address can’t change. Give the Clover a static IP over WiFi:
- Open the Settings app → Network & Internet.
- Tap and hold the WiFi network you’re connecting to. (On some Clovers you single-tap the network, tap the pencil icon to edit, then open Advanced options.)
- Open Advanced options (a pencil or gear icon).
- Scroll down to IP settings (below Proxy).
- Change IP settings from DHCP to Static, then set:
- IP address
- Gateway
- Network prefix length → 24
- DNS → 8.8.8.8, DNS 2 → 8.8.4.4
- Save and Connect.
2. Install the Network Pay Display app (Clover)›
The app may already be installed — if so, skip to the next step.
- Launch the More Tools app on the Clover terminal.
- Search for Secure Network Pay Display.
- Select it and install the app.
3. Configure the Network Pay Display app (Clover)›
- Launch and start the Network Pay Display app.
- Open the menu (three lines, top-left of the splash screen).
- Set the following:
- Server is Secure — Enabled
- Enable Pairing Screen — Disabled
- Enable Development Certificate — Enabled
- IP address — confirm the static IP you set
- Tap Configure and Restart Server.
- The app connects and shows an address like
wss://IPADDRESS:12345/remote_pay. Note it down — you’ll paste it into Auphan as the station’s Terminal ID.
Optional — turn off receipts on the Clover: Home screen → Setup app → Payment receipt → check off Skip Receipt Screen and save.
4. Install Node.js and the library (POS computer)›
On the POS / server computer:
- Install Node.js — Windows 7 or Windows 10.
- Extract the node module folder into your Auphan install folder at
\web\library\clover_flex_library\clover_flex_server— e.g.C:\restaurant\web\library\clover_flex_library\clover_flex_server.
Direct download · Dropbox mirror
5. Configure the payment processor (Auphan)›
In Auphan Management, open the Payment Processor screen and set:
- Processor — Clover Flex
- Application ID —
AHEK8A1R7VVK0.GPJY4HC3SCFSJ - Port — MAG
- Terminal ID — the WSS address from the Clover (
wss://IPADDRESS:12345/remote_pay). This is what ties the station to that pinpad.
Then configure your Payment Types.
6. Run a test transaction & pair the pinpad›
- Save the processor settings and run a test transaction. (This can also be done in debug mode.)
- Let it complete — you’ll get an error message along with a pairing code.
- Enter that pairing code on the Clover pinpad to link the two.
Troubleshooting — debugging a stuck setup›
Run DeBug.bat in:
C:\restaurant\web\library\clover_flex_library\clover_flex_server
Then repeat the steps you’re stuck on and report the results to development.
QR Table Ordering
Let guests scan a QR code at the table to browse your menu and place their order. Orders drop straight into the POS and print to the kitchen automatically.
There are two kinds of ordering QR code, and the difference is all about how much control and security you want:
- Session based — generate a one-time-use QR code when your server opens up a table. Secure, and the one-time QR code stops working the moment that bill is closed.
- Permanent table codes — a fixed code printed and left on each table. Convenient for self-serve, but they never expire, so kitchen & server both need to be aware.
1. Turn it on›
In Management → Online Orders, find the Table Order section and set:
- Enable Table Order — switches the whole feature on.
- Table QR Print — lets you print the ordering QR code.
- Payment QR Print — lets you print a pay-only QR code.
- Allow Web Table — allows ordering through the web page.
- Table Secret — the security key that signs your invoice codes. Treat it like a password.
You can also set the QR labels (the text printed next to each code) and the QR size (50–200%).
2. Build a Table Order menu›
Guests order from a dedicated menu pad, so it’s worth tailoring it for a phone screen.
In Management → Menu Pads, create (or edit) a menu pad named Table Order:
- Curate the items you want available for self-service.
- Give everything clear names, descriptions, and prices.
- Add appetizing photos — they carry the menu on mobile.
- Keep modifiers simple, and test it on a phone before going live.
The two QR code types — which to use›
Session based (secure — recommended)
- Your server opens the table, then taps More → Generate Table QR (or Print Table QR) — from the order screen or the table map.
- The code is tied to that one open bill and expires when the bill closes, so it can’t be reused or abused.
- Best for table service, pay-at-table, and any time you want tight control.
Permanent table codes
- A static code per table that you print once and leave on display.
- Handy for quick-service and high-turnover, self-serve setups.
- Set up through Auphan Tech Support — tell them which table numbers need codes.
What the guest sees›
- Scans the QR with their phone camera.
- Your OftenDining menu opens in their browser (in their language, if you offer more than one).
- Browses, adds items and modifiers to the cart.
- Checks out and pays.
- Gets a confirmation — and the order prints to the kitchen automatically.
What you see on the POS›
Orders arrive on their own — no re-keying:
- The order is created in the POS automatically and prints to the kitchen / shows on the bump screen.
- Payment is handled through OftenDining and recorded against the order.
- You manage and fulfill it like any other ticket, and it flows into your reports.
Troubleshooting›
QR code won’t load a menu — check that online ordering is enabled, Table Order is configured, OftenDining is connected, and (for an invoice code) that the bill hasn’t already been closed.
Orders aren’t coming through — check your network, that OftenDining is syncing, that the POS station is online, and that the kitchen printer / order notifications are set up.
Payment problems — check your payment processor and OftenDining payment settings.
Initial Setup
1. Initialize your Flex'sClover's out-of-box setup — skip LTE mode ›
›
If you have just received your new Flex's, you must initialize each and every Flex terminal before we can continue.
2. Download the Auphan appSpecial link + your Clover dashboard login›
To get the Auphan app onto all of your Clover Flex's, you must use the following link. You must know your username and password to your Clover dashboard login — otherwise you cannot download the app.
www.auphansoftware.com/clover_install.php
6. Verify Clover — Recovering TransactionsSet up auto-recovery so a lost transmission still closes the table›
Want to learn more about what happens when a payment goes through but the table stays open? See Card payment successful, table/invoice did not auto close.
3. Clover Settings
The following tasks may require the super admin login that was initially provided to the owner of the Clover account.
Log in to your Clover dashboard here (opens in a new tab, so this guide stays open):
www.clover.com/login
Enable "Quick Access"›
It is very important to have Quick Access enabled so that employees can use the minimum amount of features to perform their duties, which includes access to the Auphan app.
Set up tip options›
Set up offline mode to continue taking card payments (no debit, only credit cards)›
Clover devices allow you to process offline card transactions by storing them locally and submitting them for authorization once internet connectivity is restored. Your staff won't even notice when there is a temporary internet outage, as the flow is exactly the same as if the internet is still working.
Please note that this only applies to credit cards, as debit card transactions require a live internet connection to perform.
Turning off Clover's final receipt dialog — highly recommended›
If the receipt dialog is not acknowledged by either the customer or the server, this can prevent Clover from completing the transaction, and therefore preventing the table from auto closing on the POS. Turning it off is optional but highly recommended.
Most customers don't require the final copy of the invoice unless it's for a business write-off. If this receipt dialog is turned off, you can always print the invoice manually for the client.
Extremely important: turn off "dip a card to activate the Sale app" (done on the Flex itself)›
4. Auphan App Setup
The Auphan HD app on the Clover Flex operates in three modes:
Station Mode on the Flex / Pocket / Mini
Print sticker labels for each of your Flex's.
Important Features To Know
Exiting Lockdown Mode — 3 Ways›
-
Normal Exit - Station Mode
Only staff that belongs to a user group with the privilege to exit the app can exit.
-
Emergency Exit
Hold the top left corner for 5 seconds, then enter a user login code with sufficient privileges.
-
Alternate Emergency Exit
Hold the top right and bottom left corners for 5 seconds to reach the Debug menu. Adding replication servers can be done there.
Slide to confirm›
Enable slide-to-confirm for payment types to prevent applying accidental payment types such as cash.
Optimize the top and bottom buttons›
Due to the compact screen size of the Flex compared to a full sized station, you can customize what buttons to make available for the top row and bottom row.
Flex printer settings — includes Flex Pocket setup›
Clover Pocket printer setup for dynamically choosing the nearest printer›
Set the printer for Clover Pocket stations to "Ask on Print".
New — Non Table Map Mode›
If you prefer to enter the table number directly, we have a station mode that doesn't use table maps — but rather, uses an alphanumeric keypad to open a table directly.
Pay at Table Mode
First Steps
Before continuing with Pay at Table setup, please open your freshly downloaded Auphan app on the Flex and follow the next three steps:
- Highly recommended — print sticker labels for each of your Flex's.
- Connect your Auphan app to the server.
- Set up the Flex Stations in Management.
See Pay at Table in action
Take a minute to watch how a payment flows at the table — the server brings the Flex over, the guest pays and tips on the spot, and the table closes itself. The settings below fine-tune exactly this experience.
User group settings›
User group settings determine whether staff see their own invoices or see all invoices (for managers).
5. Auphan app setup under Payment Processor settings
This is where the Auphan app is connected to your payment processor inside Auphan POS management.
Please be aware this is also where you can change from using Clover's native tip screen displayed to customers, or use Auphan's own in-house tip screen. To learn more about the differences, see Customer Tipping Screens — Auphan vs Clover.
General OperationsOpérations générales
General
API for Use with AI Beta
Requires: Auphan POS version 2.9.13.53 or later.
What it is
A REST API is a secure doorway that lets another program talk to your Auphan POS directly, instead of a person logging in and clicking around. Every request carries a secret API token that Auphan issues to you. The token controls which modules the caller can reach and whether it can read only, or read and write.
Base URLs
- Production:
https://{store_id}.gw1.auphansoftware.com/api/v1.php. It is built from your Store ID, so store1234ishttps://1234.gw1.auphansoftware.com/api/v1.php. - Sandbox:
https://api1.auphansoftware.com/{DemoName}/api/v1.php
An endpoint is {base}/{module}.{action}, for example menu/products.list.
Authentication
Send your token in a header on every request:
X-Auphan-Api-Token: YOUR_API_TOKEN
Tokens are scoped to specific modules and to an access level (read only, or read and write). One token is tied to one store. Only an HQ token can target multiple stores by setting store_id per request.
Authentication errors:
| Code | HTTP | Meaning |
|---|---|---|
MISSING_TOKEN | 401 | No token header provided |
INVALID_TOKEN | 401 | Token not recognized |
USER_DISABLED | 403 | The token’s account is disabled |
STORE_ACCESS_DENIED | 403 | Token not authorized for the requested store |
MODULE_ACCESS_DENIED | 403 | Insufficient permission for a read operation |
ACCESS_DENIED | 403 | Write operation not permitted |
GROUP_NOT_ASSIGNABLE | 403 | Cannot assign the specified employee group |
Request and response format
Every request is an HTTP POST with Content-Type: application/json. The body is the Store ID plus any endpoint params:
{
  "store_id": 1,
  "params": { "page": 1, "per_page": 50 }
}
A successful response:
{ "success": true, "data": { } }
A paginated list response:
{
  "success": true,
  "data": {
    "items": [ ],
    "pagination": { "page": 1, "per_page": 50, "total": 123, "total_pages": 3 }
  }
}
An error response:
{
  "success": false,
  "error": { "code": "NOT_FOUND", "message": "Human-readable message" }
}
Common parameters
| Param | Default | Notes |
|---|---|---|
store_id (int) | required | Needed for store-scoped endpoints |
page (int) | 1 | Page number for paginated lists |
per_page (int) | 50 | Items per page, max 200 |
lang_id (int) | 1 | Language (1 = English). Pass 0 on a *.get to return all languages. |
status (int) | 1 | Filter by record status |
Endpoints
Every list endpoint is paginated (max per_page is 200). Each module needs its matching permission on your token, shown in parentheses.
Employees  (mgmt_employee)
  employees/employees.list        Paginated employee list
  employees/employees.get         Full employee detail
  employees/groups.list           Permission groups / roles
  employees/groups.get            One role with its permissions
  employees/positions.list        Job positions

Menu  (mgmt_menu_editor)
  menu/products.list              Products / items
  menu/products.get               Full product detail
  menu/categories.list            Menu categories
  menu/categories.get             Category with text, prices, taxes, printers, modifiers
  menu/report_categories.list     Item groups for sales analysis
  menu/report_categories.get      Report category detail
  menu/modifier_types.list        Modifier types
  menu/modifier_groups.list       Modifier groups
  menu/combos.get                 Combo detail
  menu/price_lines.list           Price lines
  menu/schedules.list             Menu schedules

Scheduled changes  (mgmt_scheduled_changes)
  scheduled_changes/list          List (paginated, filterable by date range)
  scheduled_changes/get           One change with attached details
  scheduled_changes/create        Create parent record (returns scheduled_change_id)
  scheduled_changes/delete        Soft-delete a change
  scheduled_changes/add_menu_change / remove_menu_change
  scheduled_changes/add_digital_menu_change / remove_digital_menu_change
  scheduled_changes/add_price_change / remove_price_change
  scheduled_changes/add_wage_change / remove_wage_change   (also needs mgmt_employee_position)

Inventory  (mgmt_purchasing)
  inventory/stock.list            Stock levels
  inventory/stock.get             Stock detail
  inventory/suppliers.list        Suppliers
  inventory/units.list            Units of measure
  inventory/recipes.get           Recipe formulations
  inventory/modifier_recipes.get  Modifier recipes

Tables  (mgmt_table_editor)
  tables/tables.list              Tables
  tables/types.list               Table types
  tables/sections.list            Sections
  tables/groups.list              Table groups
  tables/map.get                  Table map
  tables/map.object_types         Available object types
  tables/map.image_options        Preset image catalog for map objects

Printers  (mgmt_printer_editor)
  printers/printers.list          Printers
  printers/sets.list              Printer sets
  printers/assignments.get        Printer assignments

Settings  (mgmt_system_config)
  settings/store.get              Store settings
  settings/stores.list            Stores
  settings/stations.list          Stations
  settings/stations.get           Station detail
  settings/taxes.list             Taxes
  settings/payment_methods.list   Payment methods (needs mgmt_payment_methods)
  settings/courses.list           Courses
  settings/config.get             Configuration
  settings/config.schema          Configuration schema

Reports  (mgmt_reports)
  reports/types.list              Available report types
  reports/types.get               Report type detail
  reports/presets.list            Saved report presets
  reports/presets.get             Preset detail
  reports/execute                 Run a report and return results
  reports.classic/...             Same endpoints for classic reports

Files  (mgmt_menu_editor)
  files/images.list               Images
  files/product_images.list       Product images
  files/map_backgrounds.list      Table-map backgrounds
  files/map_icons.list            Table-map icons

Dashboard  (mgmt_dashboard_access)
  dashboard/tabs.list             Dashboard tabs
  dashboard/widgets.list          Widgets
  dashboard/widgets.get           Widget detail

Diagnostics  (mgmt_system_config, read-only)
  diagnostics/health.get          Store health summary
  diagnostics/printers.get        Printer diagnostics
  diagnostics/payment.get         Payment diagnostics
  diagnostics/network.get         Network diagnostics
  diagnostics/print_trace.get     Print trace log
  diagnostics/invoice_log.get     Invoice log
  diagnostics/station_snapshot.get, station_screenshot.get, station_html_snapshot.get,
  station_crash_log.get, station_console_log.get, station_network_log.get,
  station_logcat.get, station_support_bundle.get   Station diagnostics

Other
  franchise/version.get           System / API version (no permission required)
Writing data
Write operations require Modify-level access on the token’s group, and each action needs its module’s permission (for example menu/* needs mgmt_menu_editor, tables/* needs mgmt_table_editor). A few write actions are reserved for Auphan (role creation, system-level config) and return a generic 403. Permission-group assignment is restricted: you cannot assign a group with equal or higher privilege than the token’s own group, and you cannot assign HQ or franchise groups (403 GROUP_NOT_ASSIGNABLE).
Example: a scheduled price change
The flow is: (1) call scheduled_changes/create with a change_date, (2) use the returned scheduled_change_id with a detail endpoint such as add_price_change, (3) list, get, or delete as needed. Each row is validated on its own, so one bad row does not fail the others.
{
  "store_id": 1,
  "params": {
    "scheduled_change_id": "13593000001",
    "product_id": 5001,
    "size_id": 1,
    "line_id": 1,
    "price": "9.99"
  }
}
Important notes
- All list endpoints are paginated, with a maximum
per_pageof 200. - Text fields are language-localized. Pass
lang_id=0on a*.getto retrieve every language. - Treat IDs like
employee_id,user_id,customer_id, andscheduled_change_idas opaque digit strings (JSON strings, not numbers) so they survive a future 64-bit migration. - The sandbox persists writes (the response includes
"write_mode": "live") and can be reset on request. - Access is per module. One token is scoped to a single store; only HQ tokens can select
store_idper request.
Getting started
- Contact Auphan and say which modules you need and whether you need read, or read and write.
- Auphan provisions a sandbox with a
{DemoName}, astore_id, and a scoped API token. - Build and test against the sandbox.
- Auphan provisions production access with separate credentials.
- The same code works for both. Only the base URL and token change.
Downloads and live docs
- Live documentation and code examples:
https://api1.auphansoftware.com/resources/ - API bundle (documentation, auth examples, code samples):
https://api1.auphansoftware.com/resources/api.zip - Table-map preset images:
https://api1.auphansoftware.com/resources/table_map_presets.zip
HQ Control Draft
How Head Office and a branch store divide control of the menu, pricing and settings, and what happens each time the two sync.
Which mode is my store in?›
Every Auphan installation runs in one of three modes. Almost every question about “why can’t I change this?” comes down to which one you are.
- Head Office (HQ) is the master. It sees every store, and pushes menu and settings down to them.
- Branch is a store in a chain. It receives from HQ, and sends its sales back up.
- Standalone is a single restaurant with no HQ. Everything is under your control.
The quickest tell as a branch: open a product in Management. If fields are greyed out with a padlock beside them, you are a branch and Head Office owns that field.
What Head Office controls, and what stays yours›
Some things are always decided by Head Office. Some are always yours, no matter what. And a middle group can be handed either way, store by store.
Always Head Office
- The inventory tree, meaning your category and product structure
- The base menu and base pricing
- System configuration
- Loyalty programs, including rewards and redemption rules
- Customer and employee records, where those are set to sync
Always yours
- Stations, meaning your POS terminal setup
- Time clock settings and break rules, which are set per store
- Printer hardware: device name, driver, IP and screen position stay local even when Head Office owns print routing
- Payment terminals and other hardware
- Table layout and your floor plan
- Local shifts
This split is deliberate. Head Office decides what you sell; your store decides the equipment you sell it on.
The Control checkboxes›
The middle group is set per store, by Head Office, under Management → Franchise → Stores → (open a store) → Setup → Control.
Ownership is granted a group at a time, not field by field. The main ones:
- Store Price Control gives the store the price grid, size names, coupon codes, barcodes and the Combo tab
- Store Menu Control gives the store the modifier screen, auto combo, and where an item can be sold: POS, online, kiosk and table order
- Store Printer Control gives the store its kitchen print routing
- Store Product Schedule Control gives the store override times and the day and time grid
- Store Tax, Store Discount, Inventory, Supplier, Store SKU and Kitchen Rank control work the same way
- Customer Sync and Employee Sync turn those records on or off for the store
What happens during a sync›
A sync is a two-way exchange, and it always runs in the same three steps.
- Head Office sends its changes down. Anything changed since the last sync comes to the store, skipping whatever the store controls.
- The store merges them in. Head Office values overwrite the store’s copy for anything Head Office owns. Store-controlled data is left alone.
- The store sends its data up. All sales and reporting data goes to Head Office, plus any price changes the store made if it has price control.
Reporting data goes up in seven day chunks so a large history does not time out the sync. For a store that was just connected, this means Head Office catches up over several syncs rather than all at once. That is expected, not a fault.
What only Head Office can do›
A few features exist only on an HQ installation, and never appear on a branch or a standalone store.
- Employee Hours HQ, for viewing, editing and approving hours across every location from one screen
- Gift card reconciliation across the chain
- Royalty reporting
- Multi-store visibility in reporting generally
If you are a branch manager looking for one of these, it is not missing or broken. It is only shown at Head Office.
My change did not reach the store›
Occasionally Head Office makes a change and the store never sees it. The usual cause is a timing mismatch, most often after a database was restored from a backup, where the system believes the change is older than the last sync and therefore already handled.
The fix is to backdate the store’s last sync time so it asks Head Office for everything again, then sync. This needs the manual sync option enabled on the user group.
Break rules changed at Head Office never arrive
This one is not a fault and no amount of syncing will fix it. Break rules and time clock settings are store controlled, so a change made on the Head Office account is never sent down. Each store has to be changed on its own.
Marketing Campaign - Beta Draft
Marketing campaigns target customers with vouchers, discounts and notifications. This manual covers the three campaign types, every configuration option, the go-live rules, and how vouchers behave at the POS.
Where: Management → Marketing Campaign
1. Core Concepts
| Term | Meaning |
|---|---|
| Campaign | A targeting rule set + an action (voucher / sale rule) + notification settings. |
| Voucher | A unique code issued to a customer (or unassigned) that unlocks the campaign’s sale rule at the POS. |
| Sale rule | The actual discount / free-item logic (Step 3). Must contain a TGL voucher product. |
| Gift Card Account | The online TGL account the campaign belongs to. Voucher codes sync to and redeem through this account’s online server. Membership programs also belong to a gift card account. |
| Target conditions | Filters in Step 2 that decide which customers qualify. |
| Contact Customers | Master toggle for sending email / SMS notifications to qualifying customers. |
Customers must have an email or mobile number on file to be notified. Membership data and gift card balances are always read live from the online server — the local database is never used for those decisions.
2. The Campaign Profile Workflow
The profile page is organized as four steps:
- Step 1 — Details: name, description, campaign type, date range, Gift Card Account, issue limit, discount stacking, Contact Customers toggle, email subject / body (with live preview and test send).
- Step 2 — Target Conditions: add any number of conditions; all must match (AND logic). Also holds Voucher Timing (shown only when a date-anchored condition is present) and Additional Customers (manual inclusions).
- Step 3 — Setup Action: attach one or more sale rules. Hidden entirely for Reminder campaigns.
- Step 4 — Campaign Status: Go Live / Pause / End, plus voucher and notification counts.
Apply / Save is always allowed — partial or in-progress settings save freely. Validation runs only when you press Go Live (see section 7).
3. Campaign Types
Selected by the Campaign type dropdown in Step 1.
Standard Campaign
The classic form: define conditions, attach a sale rule, go live. Every customer matching the conditions gets one voucher; the voucher list refreshes automatically as customers drift in and out of the conditions (new qualifiers get vouchers; leavers keep theirs per the rules below).
Date-anchored variant. Adding any of these conditions turns a standard campaign into a date-anchored one:
- Upcoming Birthday — each customer’s birthday (this year)
- Upcoming Anniversary — each customer’s anniversary
- Lapsed Visit — N months since last visit (with optional maximum, to skip long-gone customers)
- Membership Expiry — each member’s program expiry date
Anchored campaigns run continuously: the daily cron watches each customer’s personal date and issues a voucher at the right moment. Each voucher carries its own validity window (see Voucher Timing, section 5), independent of other customers’. A customer is issued at most one voucher per anchor occurrence (per year for birthdays / anniversaries, per lapse for lapsed visit, per expiry for memberships). Once issued, a voucher keeps its window even if the customer’s data later changes.
For anchored campaigns the campaign date range only bounds the overall live window — leave the end date far in the future for an evergreen campaign.
Recurring Benefit
For paid perks that repeat every cycle — e.g. a ¥98/year VIP membership that grants a monthly free-dish voucher.
- Issue-only: vouchers are created each cycle; nothing is revoked when a member lapses (they simply stop receiving new ones).
- Notification is optional — leave Contact Customers off to issue silently.
- Each cycle’s voucher is valid for exactly that cycle period.
- Issuance is idempotent: re-running never duplicates a cycle’s voucher.
The cycle is configured on the condition itself (the fields appear only when the campaign type is Recurring Benefit):
Loyalty Membership condition (* required — see below):
- Benefit cycle:
- Each member from their activation date — every member’s cycle rolls from their own membership start date (e.g. activated on the 16th → periods run 16th to 15th). A member activated mid-period still gets the current period’s voucher (catch-up within the period).
- Shared fixed period for everyone — one shared calendar cycle for all members, using Issue every (months) + Starting on. Members whose membership started after the current period began wait for the next period.
- Membership is resolved online (the TGL server is the source of truth); a member whose gift card account has issues is still issued — account problems are resolved separately.
- Members with unusable days at the end of a paid year (because periods align to activation) receive the equivalent period after expiry — they get what they paid for.
Customer Group condition (* required alternative):
- Always a shared fixed period: Issue every (months) + Starting on.
- Everyone in the group gets the same period and validity window.
At least one of these two conditions is required to go live — they are marked with * in the condition dropdown, and the legend below Step 2 explains this. Other conditions can be combined to narrow the audience further; local conditions are evaluated first and only the resulting candidates are checked online.
Reminder
Notification-only: no vouchers, no sale rules (Step 3 is hidden). Use for service reminders — “time to rotate the tires you bought”, “you still have a gift card balance”.
- Requires Contact Customers on to do anything (the Go Live confirmation warns if it is off).
- Pairs naturally with the Purchased Product / Has Not Purchased Product conditions (section 4) — e.g. purchased tires 6 months ago → rotation reminder.
- Each reminder fires once per qualifying purchase: buying tires again later re-qualifies the customer for a new reminder tied to that new invoice.
- The email / SMS uses the same template tokens minus the voucher-specific ones (no code / barcode / QR).
4. Target Conditions Reference
All conditions in a campaign must match (AND). Duplicate conditions are not allowed. Purchase-history conditions always search the full history (active + archived invoices).
| Condition | Operators | Options |
|---|---|---|
| Birthday within period | — | From / To dates (matches month-day within the range) |
| Upcoming Birthday ⚓ | — | anchored; uses Voucher Timing |
| Upcoming Anniversary ⚓ | — | anchored; uses Voucher Timing |
| Lapsed Visit ⚓ | — | Inactive at least (months), Inactive at most (months, optional). Sends after the period is reached — no advance send. |
| Membership Expiry ⚓ | — | Membership program picker (scoped to the campaign’s Gift Card Account); uses Voucher Timing (negative offset = send after expiry) |
| Customer Group | is | group picker; + cycle fields for Recurring Benefit |
| Loyalty Membership | is | program picker (scoped to the Gift Card Account); matches active, non-expired members resolved online; + cycle fields for Recurring Benefit |
| Gift Card Balance | ≥ ≤ > < = | amount + Gift Card Account picker; balances resolved online, linked cards counted once |
| Purchased Product | — | include / exclude product & category grid + mode: ever / elapsed (bought ≥/≤/= N days or months ago) / period (bought within From–To) |
| Has Not Purchased Product | — | same pickers, inverted |
| Total Spend | = < > ≤ ≥ | amount, optional From / To dates, optional product / category grid |
| Invoice Count | = < > ≤ ≥ | count, optional From / To dates |
| Last Active (days) | = < > ≤ ≥ | days, optional Before date |
| Account Age (days) | = < > ≤ ≥ | days since first invoice |
| Order Type | is | order type picker |
| Payment Method | is | payment type picker |
| City / Province-State | is | matches any of the customer’s addresses |
| Company / custom fields | is | text match |
| Fixed Vouchers | — | generates N unassigned voucher codes (no customer targeting) — hand out manually |
⚓ = date-anchored condition (enables Voucher Timing, drives per-customer issuance).
Additional Customers (below the conditions) manually includes specific customers regardless of the conditions.
Gift Card Account ordering: membership conditions cannot be added until a Gift Card Account is selected, and the program list only shows that account’s programs.
5. Voucher Timing (anchored campaigns)
Shown in Step 2 when a date-anchored condition is present:
- Send days before (negative = after) — how many days before the customer’s date the voucher is issued / sent. Use a negative number to send after the date (e.g. -3 = three days after the membership expired).
- Valid for this many days after — the voucher stays valid from its date through this many days after.
Example: birthday June 15, send 7 before, valid 5 after → voucher arrives June 8 and works June 15–20. The window is fixed at issue time; later profile changes don’t revoke it.
Lapsed Visit ignores the send offset — it sends once the inactivity threshold is reached.
6. Notifications
- Contact Customers (Step 1) — master switch. Off = vouchers are issued silently (useful for Recurring Benefit perks redeemed in person).
- Send window — notifications only go out between
marketing_notify_startandmarketing_notify_end(System Config → Marketing; default 11:00–18:00 store time). Anything triggered outside the window waits for the next cron run inside it. No 2 AM texts. - Email — subject / body editor with variable buttons, live preview and Send Test Email. The preview substitutes sample data (customer “John Doe”, birthday June 15, sample barcode images).
- SMS / app push — plumbing is in place (statuses tracked); the actual send channels are not yet implemented.
Template Variables
Usable in campaign emails and Email Templates (Management → Email Templates):
| Token | Result |
|---|---|
[FIRSTNAME] [LASTNAME] | Customer name |
[STORENAME] | Store name |
[CAMPAIGN_NAME] [CAMPAIGN_DESCRIPTION] | Campaign fields |
[VOUCHER_CODE] | The voucher code |
[VOUCHER_BARCODE] [VOUCHER_QR] | The voucher code as a scannable image |
[BIRTHDATE] / [BIRTHDATE+N] | Customer’s birthday (no year), optionally +N days |
[ANNIVERSARY] / [ANNIVERSARY+N] | Anniversary (no year), optionally +N days |
[MEMBERSHIP_EXPIRY] / [+N] | Membership expiry as a full date with year, resolved live online |
[GIFT_CARD_BALANCE] | Customer’s current gift card balance, money-formatted, resolved live online |
[BARCODE=value] [QR=value] | Any literal value rendered as barcode / QR image |
Voucher-specific tokens are unavailable in Reminder campaigns.
7. Statuses, Go Live and Validation
Campaign statuses: Live (green), Paused (amber), Ended (grey) — shown as a Status column with colored text in the campaign listing.
| Action | Effect |
|---|---|
| Go Live | Validates (below), issues vouchers for current qualifiers, syncs everything to the online gift card server, sends pending notifications. |
| Pause | Stops the cron from processing the campaign; syncs the paused state online so vouchers report “Promotion is Not Active” at the POS. New campaigns start here. |
| End | Disables all vouchers and syncs; POS reports “Promotion Ended”. Reactivate goes through Paused (vouchers re-enabled). |
Go Live validation — all of these must pass (Apply never checks them):
- At least one target condition (any type counts).
- Non-reminder campaigns: at least one sale rule, and the sale rule must contain a TGL voucher product.
- Non-reminder campaigns: a Gift Card Account must be selected (voucher codes redeem through it).
- Campaign end date must not already be in the past.
- Standard campaigns: explicit start and end dates.
- Recurring Benefit: a Loyalty Membership or Customer Group condition (the
*ones) with complete cycle settings (program selected; fixed mode needs interval ≥ 1 month and a starting date). - Membership conditions: the program must belong to the campaign’s Gift Card Account.
- Lapsed Visit: minimum months > 0; maximum (if set) greater than minimum.
- Membership Expiry: a program must be selected.
The Go Live confirmation summarizes what will happen — including an explicit warning when Contact Customers is disabled.
8. Redemption at the POS
Voucher codes are entered / scanned at the POS and validated online against the gift card server. Distinct failure messages:
| Message | Meaning |
|---|---|
| Voucher Not Found | Code doesn’t exist for this account. |
| Promotion is Not Active | The campaign is Paused / not yet live. |
| Promotion Ended | The campaign was ended. |
| Voucher has Not Started / Voucher Expired | Outside the voucher’s own validity window. |
| Voucher is Not Assigned to this Account | Belongs to another customer’s account. |
Anchored and Recurring Benefit vouchers enforce their per-voucher window; standard vouchers follow the campaign date range.
9. System Configuration Reference
| Config | Purpose | Default |
|---|---|---|
marketing_notify_start | Earliest daily notification time (store-local HH:MM) | 11:00 |
marketing_notify_end | Latest daily notification time | 18:00 |
marketing_default_email_subject/body/sms | Prefilled content for new campaigns | — |
sms_alibaba_signature | Signature prefix for Alibaba SMS sends | copied from sms_signature |
10. Troubleshooting
- “Promotion is Not Active” for a code you expect to work — check which campaign the code belongs to (the code’s prefix is the campaign id) and that that campaign is Live. Going live on one campaign does not activate another’s vouchers.
- No notifications going out — check Contact Customers is on, the time is inside the notify window, and the customer has an email / mobile on file.
- Membership condition matches nobody — membership is resolved online; verify the online server is reachable and the program belongs to the campaign’s Gift Card Account. On any online failure the campaign fail-safes to issuing nothing rather than guessing.
- Recurring Benefit issued nothing on Apply — issuance only occurs for the current cycle period; a fixed-period campaign whose period hasn’t started (or whose members all joined mid-period) issues at the next period start.
Welcome! — User Interface OverviewBienvenue ! — Aperçu de l'interface
A quick tour of the main screens you'll use day to day. Tap a screen below to explore what each area does.Un survol rapide des principaux écrans que vous utiliserez au quotidien. Touchez un écran ci-dessous pour explorer ce que fait chaque zone.
Login ScreenÉcran de connexion
Table Maps — Full Table ServicePlans de salle — Service à table complet
Ordering Screen — Full Table ServiceÉcran de commande — Service à table complet
Ordering Screen — Quick Service VariationsÉcran de commande — Variantes service rapide
Quick Service setups use the same ordering screen with a few differences suited to counter-service speed. An interactive walkthrough of the variations is coming soon.Les configurations en service rapide utilisent le même écran de commande, avec quelques différences adaptées à la vitesse du service au comptoir. Une visite interactive des variantes arrive bientôt.
Three Dots = More OptionsTrois points = plus d'options
To learn more about the customizable “More” buttons, click here for the Customizable Buttons Reference Guide.Pour en savoir plus sur les boutons « Plus » personnalisables, cliquez ici pour consulter le guide de référence des boutons personnalisables.
Light Mode OptionOption mode clair
Clover Flex Interface OverviewAperçu de l'interface Clover Flex
Station Mode on the Flex runs exactly the same as a full screen station. Because the screen is smaller, though, a few parts of the interface work differently — here's what to look for.Le mode Station sur le Flex fonctionne exactement comme une station plein écran. Comme l'écran est plus petit, cependant, quelques parties de l'interface fonctionnent différemment — voici ce qu'il faut surveiller.
Interactive Gallery of User OperationsGalerie interactive des opérations
Table Map OverviewAperçu du plan de salle
Menu Ordering OverviewAperçu de la commande au menu
Invoice OverviewAperçu de la facture
Light Mode OptionOption mode clair
Web-SRM — What Happened?Web-SRM — Que s'est-il passé ?
Quebec’s fiscal rules change what you’re allowed to do to an invoice, and the right move often isn’t the obvious one. Pick the situation that matches yours.Les règles fiscales du Québec changent ce que vous avez le droit de faire à une facture, et la bonne action n’est souvent pas la plus évidente. Choisissez la situation qui correspond à la vôtre.
For Your StaffPour votre personnel
For Auphan Technicians & InstallersPour les techniciens et installateurs Auphan
Clock In / Clock OutPoinçon d'entrée / de sortie
Opening a TableOuvrir une table
Assigning SeatsAttribuer les places
Renaming SeatsRenommer les places
Coursing - Fire & HoldServices — Lancer et attendre
Menu with auto coursing setupMenu avec configuration automatique des services
Open coursing, starting from “Course 1”Services ouverts, en commençant par le « Service 1 »
Purely optional coursingServices entièrement optionnels
Create a Delivery OrderCréer une commande de livraison
Create a Takeout OrderCréer une commande à emporter
Close TransactionsClôturer les transactions
Card Payment on FlexPaiement par carte sur Flex
Closing Split Payment TypesClôturer les paiements fractionnés
Split a BillFractionner une facture
Basic Splitting — Splitting From One SeatFractionnement de base — fractionner à partir d'une place
Combining Seats to Split — Important FundamentalsCombiner des places pour fractionner — principes fondamentaux importants
Basic Splitting — Seat Selection Was UsedFractionnement de base — sélection de place utilisée
The following video assumes you have assigned specific seats to the items ordered.La vidéo suivante suppose que vous avez assigné des places spécifiques aux articles commandés.
Various Seating/Splitting ViewsDifférentes vues de placement/fractionnement
Split By SeatFractionner par place
Split By Seat instantly splits all the seats as is — every seat number becomes its own invoice. If you've properly assigned each seat to its ordered items and everyone wants to pay for themselves, this is the easiest method. You can also access “Split by Seat” under the More section and simply split, but without printing.Fractionner par place divise immédiatement toutes les places telles quelles — chaque numéro de place devient sa propre facture. Si vous avez bien assigné chaque place à ses articles commandés et que tout le monde veut payer pour lui-même, c'est la méthode la plus facile. Vous pouvez également accéder à « Fractionner par place » sous la section « Plus » et simplement fractionner, mais sans impression.
Split X WaysFractionner en X parts
Split an ItemFractionner un article
Commonly used splitting method that's usually done at the very end.Méthode de fractionnement couramment utilisée, généralement effectuée à la toute fin.
Splitting an item earlyFractionner un article tôt
Splitting an item early in the dining experience, when a guest tells you up front.Fractionner un article au début de l'expérience culinaire, quand un client vous le dit d'avance.
Split by Accident — Re-combining Split InvoicesFractionner par accident — recombiner les factures fractionnées
Merging Two TablesFusionner deux tables
Reopening a Closed TransactionRéouvrir une transaction fermée
Before you decide to Recall (i.e. Reopen) a closed invoice, consider the following:Avant de décider de rappeler (c.-à-d. réouvrir) une facture fermée, considérez ce qui suit :
- By default only users from the higher user groups (e.g. Manager or higher) are allowed to recall. Different user groups might have different limits on how old an invoice they can recall. If you exceed the limit for your user group, the system will prompt you to seek authorization from another user.Par défaut, seuls les utilisateurs des groupes d'utilisateurs supérieurs (par exemple, gestionnaire ou supérieur) sont autorisés à rappeler. Différents groupes d'utilisateurs peuvent avoir des limites différentes sur l'ancienneté d'une facture qu'ils peuvent rappeler. Si vous dépassez la limite de votre groupe d'utilisateurs, le système vous demandera d'obtenir une autorisation d'un autre utilisateur.
- Reporting values are calculated by adding up closed invoices, so recalling an invoice immediately excludes it from any reporting calculations until it’s reclosed. If you change then reclose, or delete the invoice, the changes will retroactively affect reporting and invalidate any previously printed report for this period.Les valeurs de rapport sont calculées en additionnant les factures fermées, de sorte que le rappel d'une facture l'exclut immédiatement de tout calcul de rapport jusqu'à ce qu'elle soit refermée. Si vous modifiez puis refermez, ou supprimez la facture, les modifications affecteront rétroactivement la génération de rapports et invalideront tout rapport précédemment imprimé pour cette période.
- Recalling an invoice will let you change the items on it, but you also need to match any changes to the total payable amount via equal changes to the payment. So if you add an item, for example, you’ll need to collect extra payment unless you discount the amount added. Similarly, removing items should be followed by a void or partial refund of the payment amount — this is often not possible depending on when and how the original payment was processed, in which case you should not recall the invoice.Le rappel d'une facture vous permettra de modifier les articles sur celle-ci, mais vous devez également faire correspondre les modifications apportées au montant total payable par des modifications égales au paiement. Donc, si vous ajoutez un article, par exemple, vous devrez collecter un paiement supplémentaire à moins que vous ne réduisiez le montant ajouté. De même, la suppression d'articles doit être suivie d'un annulation ou d'un remboursement partiel du montant du paiement — ce qui n'est souvent pas possible selon le moment et la façon dont le paiement initial a été traité, auquel cas vous ne devriez pas rappeler la facture.
Find Missing Open InvoicesTrouver les factures ouvertes manquantes
Apply an Item DiscountAppliquer une remise sur un article
Apply a Bill DiscountAppliquer une remise sur la facture
Splitting a Big Table GroupFractionner un grand groupe de table
We have various ways to help you split a big group easily. The examples below are all based on a table of 20 people.Nous avons différentes façons de vous aider à fractionner facilement un grand groupe. Les exemples ci-dessous sont tous basés sur une table de 20 personnes.
Combine and PrintCombiner et imprimer
Example: Seat 1, Seat 4, and Seat 5 are going to pay together — you combine those three and print.Exemple : La place 1, la place 4 et la place 5 vont payer ensemble — vous combinez ces trois places et vous imprimez.
Moving a TableDéplacer une table
Transferring ItemsTransférer des articles Draft
Transferring items moves one or more items from one invoice to another, without re-ringing them. Use it to split a shared dish onto one guest's bill, fix an item rung on the wrong check, or pull items together when two parties join.Transférer des articles déplace un ou plusieurs articles d'une facture à une autre, sans les refrapper. Utilisez-le pour diviser un plat partagé sur la facture d'un client, corriger un article frappé sur le mauvais chèque, ou regrouper les articles quand deux parties se joignent.
From an open invoiceÀ partir d'une facture ouverte
The quickest way during service, right from the check you are working in.Le moyen le plus rapide pendant le service, directement à partir du chèque sur lequel vous travaillez.
- Open the invoice you want to move items off of.Ouvrez la facture d'où vous voulez déplacer des articles.
- Tap the item you want to move. To move several at once, multi-select them.Touchez l'article que vous voulez déplacer. Pour en déplacer plusieurs à la fois, sélectionnez-les par multi-sélection.
- Tap More, then Transfer Item.Touchez Plus, puis Transférer l'article.
- Choose the destination invoice to move the items to.Choisissez la facture de destination vers laquelle déplacer les articles.
- Confirm. The items move over and both bills update automatically.Confirmez. Les articles se déplacent et les deux factures se mettent à jour automatiquement.
From a table with several invoicesÀ partir d'une table avec plusieurs factures
Handy when a table has been split into a few invoices and you want to shuffle items between them in one place.Pratique quand une table a été divisée en plusieurs factures et que vous voulez mélanger les articles entre elles au même endroit.
- Open the table, then tap the invoice count to open its invoice list.Ouvrez la table, puis touchez le nombre de factures pour ouvrir sa liste de factures.
- Select the invoice, or invoices, you want to move items from.Sélectionnez la ou les factures dont vous voulez déplacer des articles.
- Tap Transfer Items in the toolbar.Touchez Transférer les articles dans la barre d'outils.
- Pick the items to move, choose the destination invoice, and confirm.Choisissez les articles à déplacer, choisissez la facture de destination, et confirmez.
Changing the Number of GuestsChanger le nombre de clients
Cash Out ReportRapport de clôture de caisse
Charged the Wrong Table — Transfer PaymentFacturé à la mauvaise table — Transférer le paiement
Pay at Table (PAT) ModePaiement à la table (PAT) Mode
In this classic payment mode, taking the payment through Auphan's PAT mode will automatically close the table.Dans ce mode de paiement classique, effectuer le paiement via le mode PAT d'Auphan fermera automatiquement la table.
- Set up user groups to restrict servers to only seeing their own invoices, as opposed to managers seeing the entire restaurant's open invoices.Configurer les groupes d'utilisateurs pour restreindre les serveurs à voir uniquement leurs propres factures, par opposition aux gérants voyant toutes les factures ouvertes du restaurant.
- Split invoices will show up accordingly in PAT mode.Les factures fractionnées s'afficheront en conséquence en mode PAT.
Customer Tipping Screens — Auphan vs Clover
The primary advantage of using Auphan's built-in tipping screen is the ability to tip on gross on split payments. Gift cards are the primary use case and example of tipping on gross on the remaining balance.
Setting Up Clover Tip Screen
You can switch between Clover's native tip screen and Auphan's in-house tip screen under Payment Processor settings.
Gift Card Scanning FunctionsCarte-cadeau Fonctions de numérisation
With the built-in camera of the Clover Flex, you can now sell or redeem a gift card right at the table side with your guests.Avec la caméra intégrée du Clover Flex, vous pouvez maintenant vendre ou utiliser une carte-cadeau directement à côté de la table avec vos clients.
Activating a gift cardActiver une carte-cadeau
Here is a quick video of what the process is like to activate a gift card:Voici une courte vidéo montrant comment activer une carte-cadeau :
Redeeming a gift cardUtiliser une carte-cadeau
Here is a video of redeeming a gift card via the Flex:Voici une vidéo montrant comment utiliser une carte-cadeau via le Flex :
Redeeming a gift card in PAT modeUtiliser une carte-cadeau en mode PAT
Changing Payment TypeChanger le type de paiement
Customer already paid with their Credit Card, and now wants to pay with a different payment type.Le client a déjà payé avec sa Carte de crédit, et veut maintenant payer avec un type de paiement différent.
Which method you use comes down to one question: is this happening the same day?La méthode que vous utilisez dépend d'une seule question : cela se passe-t-il le même jour ?
Refunding Credit/Debit Card After Batch ClosedYou can no longer void. Refund the original payment, then re-charge on the correct type.Remboursement de carte de crédit/débit après fermeture du lotVous ne pouvez plus annuler. Remboursez le paiement original, puis facturez à nouveau sur le bon type.›
VoidsAnnulations
Voids can only be done on the same day, before batch closes.Les annulations ne peuvent être effectuées que le même jour, avant la fermeture du lot.
Voids can be done from any terminal, and you do not have to recall the invoice to void the payment. You only need to recall the invoice if you are on the Clover Flex.Les annulations peuvent être effectuées à partir de n'importe quel terminal, et vous n'avez pas besoin de rappeler la facture pour annuler le paiement. Vous n'avez besoin de rappeler la facture que si vous êtes sur le Clover Flex.
Reasons why it's recommended to use voids instead of refunds, especially on the same day:Raisons pour lesquelles il est recommandé d'utiliser des annulations au lieu de remboursements, en particulier le même jour :
- Changing payment type — the customer paid with Visa, but wants to pay with AMEX now instead.Changer le type de paiement — le client a payé avec Visa, mais veut maintenant payer avec AMEX à la place.
- The invoice total has changed, so you simply want to start over again. Void, make the adjustment to the invoice, and then do a fresh new charge to the guest's card payment.Le total de la facture a changé, vous voulez simplement recommencer. Annulez, effectuez l'ajustement sur la facture, puis facturez à nouveau le paiement par carte du client.
Refunds — With Payment IntegrationRemboursements — Avec intégration des paiements
Every refund is just a brand-new invoice that negates a past sale — one item, or the whole invoice.Chaque remboursement est simplement une nouvelle facture qui annule une vente passée — un article, ou la facture entière.
Reference a past invoiceRéférencer une facture passée
Locate the closed invoice and use it as a reference to create the new invoice for the refund.Localisez la facture fermée et utilisez-la comme référence pour créer la nouvelle facture pour le remboursement.
Enter it freshL'entrer à nouveau
You already know exactly what to refund — start a new invoice and enter the items to refund.Vous savez déjà exactement ce qu'il faut rembourser — commencez une nouvelle facture et entrez les articles à rembourser.
Not applicable in QuebecNe s'applique pas au Québec
Full RefundRemboursement complet›
Partial RefundRemboursement partiel›
Refund to Credit / Debit in PAT ModeRemboursement en crédit / débit en mode PAT›
Refunding to a table that’s already actively open? No problem, just shows up as a split invoice, easy peasy!Rembourser une table qui est déjà activement ouverte ? Pas de problème, ça apparaît simplement comme une facture divisée, c'est facile !
Independent RefundRemboursement indépendant›
Refunding Tips to Card PaymentRemboursement des pourboires au paiement par carte›
Troubleshooting
Choose the issue that matches what you're seeing:
Good to know — nightly Flex reboot
Poor WiFi & networking — the root cause of many issues
Your Flex terminals talk to both the Auphan server and Clover's payment network over your WiFi. When that connection is weak or unstable, the symptoms show up everywhere else — and they're easy to misdiagnose as app problems.
Symptoms that usually trace back to networking
- Tables not closing automatically after a successful payment (lost transmission)
- The Auphan app showing a disconnected screen
- The Clover payment screen not appearing after initiating a card payment
- Slow or unresponsive behaviour that comes and goes with location in the restaurant
What a solid setup looks like
- A dedicated, secured network for your POS — never share the guest WiFi with your terminals.
- Strong coverage everywhere staff take payments — patios, private rooms and far corners included. Dead zones are where lost transmissions happen.
- Business-grade router and access points — consumer equipment struggles with a busy restaurant full of phones.
- A reliable internet connection — payment confirmations depend on it in real time.
If you are unsure about your network, please talk to us before going live — a one-hour network review is much cheaper than a dinner rush of failed payments.
Card payment successful, table/invoice did not auto close
It can be confusing and frustrating when tables don't auto close when they should after a successful guest payment.
My Table Didn't Close!
We now have a built-in auto recovery and manual recovery with Clover payments.
- Auphan will automatically try to recover the payment to auto close the table — for up to four minutes.
- If this still fails, or you don't want to wait, you can simply hit "Verify Clover" to close the table.
Setting up Verify Clover
Final Fallback — Close Table Manually
This requires a manual close button to be set up first, and it may be called "Standalone Visa", "Standalone MC", "Offline AMEX", etc.
Why does this happen?
Unfortunately, there are many variables that are out of the POS software's control that could lead to this result, such as:
- Weak or intermittent local network / WiFi (wireless is never 100%, and the signal is only sent back once from Clover — or any payment processor in general).
- Intermittent internet packet loss (signals can intermittently get lost over the internet) and may not even reach the restaurant.
- Highly unlikely, but still possible — Clover's servers didn't quite send the return confirmation transmission.
To be clear, these factors affect how all payment processors relay with an integrated POS.
Quick Access button disappeared
Unfortunately, this is a Clover issue — it's a bug where the Quick Access button will randomly disappear and then reappear (if at all).
We have informed Clover of this issue, but have never heard back if they have found the bug and fixed this disappearing button issue.
Identifying Clover Flex's Auphan App Version
It's not often at all, if ever, that you need to know what version your Auphan app is on the Flex.
For that rare occasion, you must log in as an administrator with your PIN. Absolutely no “Quick Access.”
Can't Remote Login Anymore — Access Denied
If you attempted too many login attempts with the wrong username and/or password, you will need to call Auphan Tech Support to help you re-enable remote login.
Auphan app showing a disconnected screen
There are a couple of reasons that can cause this to happen:
- The Flex may be connected to a different WiFi network. This may not be obvious at first. This can happen when the Flex was first being set up: if it connected to more than one WiFi network, the Flex will default to the other network it has connected to before if the primary WiFi connection cannot be found.
- Are ALL of your other terminals also showing a disconnect screen? If so, there are two things to check — but the first thing is to see if the server computer is still on. If the server is still on for sure, then you need to check if your local area network went down. If you still need help, please reach out to tech support.
- The IP address of the server computer changed. Some installers label the server computer with the IP address, and it would look something like
192.168.0.99. If you know for sure the server IP address has changed, please click on the cog wheel on the bottom right to enter the new IP address.
How do I update my Auphan version?
Auphan POS software updates are to be requested from your Auphan onboarding person.
Following are the considerations when requesting an update:
- Updates are best scheduled going into the restaurant’s slowest day of the week, like a Monday
- In case there are any issues after the software update, thus minimizing any impact on business on the slowest day
- If you aren’t on our support plan, we welcome you to update by signing up with us for support
- The actual update itself only takes a few minutes
Which Version Am I On?
On a full-screen station, the version is shown in the bottom-right corner of the login screen.